While not typically a day-to-day business scenario, circumstances may arise where bulk case closure is useful or even necessary. For instance, if a large number of cases were imported into Case Central but were processed outside of the system, you may wish to maintain the the records but set them to a Resolved state. In these situations, administrative users can override default system behavior to force case closure.
Bulk Case Resolution bypasses logical checks and balances to validate the completion of investigation steps and case information. It updates the cases' Status and Resolution values, but does not send Response data to any integrated systems, including e-OSCAR®. In addition, any pending To Do's and Escalations will be canceled when the cases are updated to Resolved.
Caution
Due to the nature of this feature, access should be limited to Users who understand the risks and ramifications of bulk closure. Once submitted, actions taken under Bulk Case Resolution cannot be reversed.
Administration Guide
Who Can Use this Feature?
Management and use of this feature is available to all users with an Administrator license, by default. Users with a Standard license who have been granted Bulk Resolution site rights also have access to this feature.
Where Is It Set Up?
To access the Bulk Case Resolution page, click on the vertical sidebar menu. Then go to → .
Helpful Tips
Things to Remember
Exercise caution when using Bulk Case Resolution because the resolution of selected cases cannot be undone.
No validation is run to check the completeness of the case information.
The Bulk Case Resolution process does not send any Response data to e-OSCAR®.
Case Selection & Filtering Results
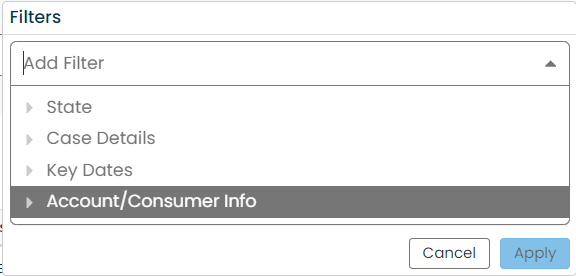
The page offers Advanced Filters to refine the list of cases to those you want to resolve together. The resulting set should contain only cases that share the same outcome and Resolution values.
Upon loading, the results table shows all Active cases with a Status of Pending or Under Review. By default, they are listed by Case Number in ascending order. To narrow down the results by one or more keywords, enter a search term in the Text Filter box above the results list. Click Enter.
In addition to using keyword(s), certain fields can be used to filter the results to just those cases that are relevant. Click  to select the field and corresponding values that match the cases you want to set to Resolved. Click Apply and repeat for additional fields as needed.
Modifying the Displayed Results
The Toggle Columns feature can be used remove one or more of the data fields from the results list.
Click on the  dropdown and select the name of each field you wish to exclude. The corresponding column will be removed from the table, and the field name will be grayed out in the dropdown list.
To restore the column to the table, click on the field name in the dropdown list again.
Managing Cases with Bulk Resolution
In the results list on the page, select each case you wish to resolve by checking the
 icon to the left of the Case Number. Alternatively, use the
  button to select all the cases visible on the screen.
Note
The Select All button will not select cases that aren't shown in the current page view, even if they meet the filter criteria.
Click the
 button to open the panel.
Enter the Resolution values to be applied to each of the selected case records.
Important
Only select cases that should have the same Resolution values. The information provided here will be applied to each case record.
Select the Final Finding.
Select the Root Cause, if appropriate.
Select the Final Action, if appropriate.
Enter the Resolution Notes.
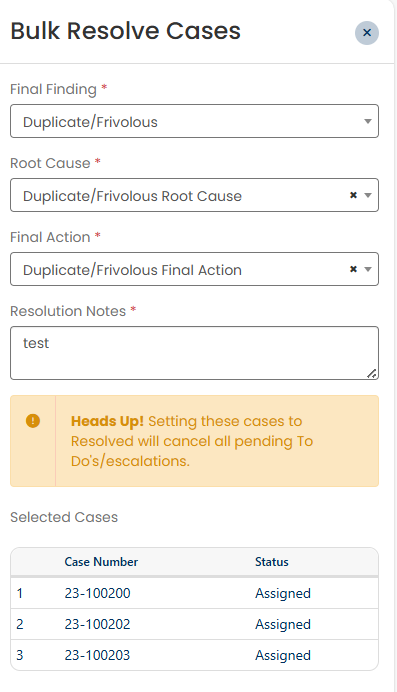
Click Save.
The Bulk Case Resolution feature may be used to resolve a single case. The steps are the same as those for resolving multiple cases at the same time.
Click the
 button in the column on the screen.
Enter the details to be applied and saved to the case record.
Select the Final Finding.
Select the Root Cause, if appropriate.
Select the Final Action, if appropriate.
Enter the Resolution Notes.
Click Save.