Administrative users can add, update, and edit the settings applied to user accounts, including enabling and disabling users, bulk adding users to the system, and managing the permission settings for users without an Administrator license.
Each user is given an Assigned Role that aligns with their user account's license type. The Assigned Role comes with a default set of permissions, although additional rights may be granted for further access to app pages, features, and data in the system.
Currently, there are two different license types and Assigned Roles available in Case Central®:
Administrator – has access to the entire system
Standard – has access to end-user functions in the system and may be granted explicit additional Permissions to administrative pages and features, as well as data.
Submitter – designed for front-line staff such as customer service representatives, branch staff, call center agents, and mailroom personnel. Submitters can create new cases using the form and view high-level case statuses, but have no access to administrative features or detailed case data.
Auditor – intended for compliance officers, support teams, executive sponsors, and anyone needing visibility into Case Central without the ability to create, modify, or be assigned work on a case. Auditors have read-only access to and the ability to view and export reports. Individual permission settings control the Case Inventory scope for the user, who can use and to filter, sort, and drill down into the cases they wish to view.
Note
The Submitter and Auditor roles are not automatically available in all environments. Contact your Customer Service team to have it enabled.
Administration Guide
Who Can Use this Feature?
Management and use of this feature is available to all users with an Administrator license, by default. Users with a Standard license who have been granted User Management site rights also have access to this feature.
Where Is It Set Up?
To access the page, click on the vertical sidebar menu. Then go to → .
Helpful Tips
Managing Licensed Seats
The system will not allow you to select more Administrators than you are licensed to have. If you are adding a new user and cannot select them to be an Administrator but you can select for them to be a Standard User, it is highly likely that your organization has reached their current maximum number of administrators.
Be vigilant in disabling users who should no longer be using the system.
Filtering Results
The page offers Advanced Filters to refine the results list and make it easier to find an existing User. This is particularly helpful in a larger organization or when more than one page of results is returned.
To narrow down the results by one or more keywords, enter a search term in the Text Filter box above the results list. Click Enter.
Additionally, certain fields can be used to filter the results to just those Users who are relevant. Click  to select the field and values to filter the results by. Click Apply and repeat for additional fields as needed.
Managing Users
Click the
 button in the upper right-hand side of the screen and select Add Single User to open the panel.
Enter the new user's details.
Enter values for the Required fields: Email, First Name, and Last Name.
Enter values for the optional fields, if desired: Employee ID, Title, Department, Location, and Phone Number.
Select the appropriate Role for the new user.
To generate a system email to the new user, check the Send Welcome Email checkbox. Once checked, a Preview link will appear to view the email.
Click Continue to open the screen.
Set the appropriate Permissions for the user.
Permissions can be set individually or, for greater efficiency, use a previously created Permission Template.
To apply a Permission Template, select the appropriate one from the dropdown in the upper right corner of the screen. The template will load.
Review the Permission Template to ensure it is correct, then click Apply Template in the lower right-hand corner.
Click Save.
Click the
button in the upper right-hand side of the screen and select Bulk Add Users to open the panel.Click the
 icon to download the data list template file. The detailed information on new Users must be filled out in the format indicated in order to be uploaded into Case Central®.
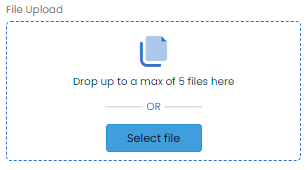
Using the File Upload box, upload the completed file by dragging and dropping it, or by clicking the Select File button to browse for it.
Click Add Users.
Activate or Inactivate a Single User
To disable a User, click the
 icon under the Actions column to move the toggle switch to the left
  position.
To enable a User, click the
icon under the Actions column to move the toggle switch to the right position.
Bulk Change User Status
Select the Users whose statuses should be changed by clicking the
 on the left side of each User Name.
Click the
dropdown in the upper right-hand corner of the screen and select Toggle User Status to change the status of the selected Users. Active users will become Inactive, and vice versa.