Checklist Configuration Settings
Certain configuration options that drive how other features handle Investigation Checklists within the system.
The Data Compare Configuration feature allows an admin user to group, order, and rename data fields so that in every Checklist with a Data Compare step, the fields will be arranged in the way most useful to your organization and using the terminology with which your team members are most familiar. This functionality is optional and does not need to be configured.
The Reporting Configuration feature allows an admin user to select which Checklist fields will be made available to users for reporting. Some fields are excluded based on their Content type due to the inherent structural limitations of tabular reports.
From the page, click the
 dropdown in the upper right-hand corner of the screen and select .
The panel will open with two columns.
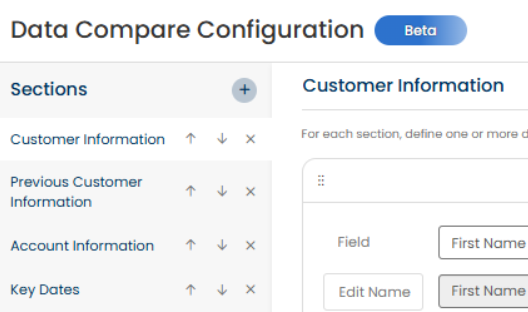
The Sections area on the left will display the groupings that, once created, will organize the data fields for any Data Compare content item used in a Checklist step.
The righthand area will list the data fields that, once added for a given Section, will be available for selection and inclusion when an admin user uses a Data Compare content item in an Investigation Checklist they are configuring.
Click the
 icon to the right of the Sections heading to add a new Section.
By default, the new Section will be named New Section. Rename it to something descriptive for the group of data fields to be included.
For example, if you wanted the first grouping to be Consumer Information, you may enter that as the Section label.
The righthand panel will display the Section label. Add the data fields you want to include in this Section.
Click the
in the center of this column to open the data fields box.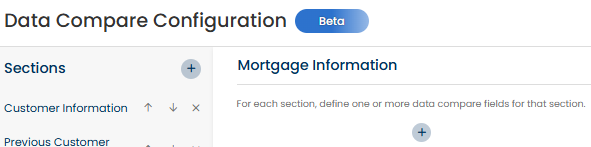
Select the data field from the Field dropdown.
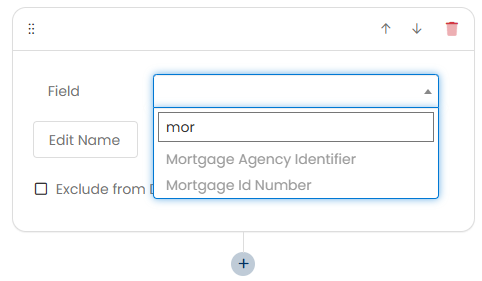
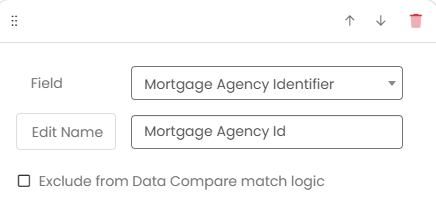
If you want to use a different display label for the field, click on Edit Name and type in the new name.
Note
Be sure to keep the name relevant to the data value itself. These fields map to e-OSCAR® or have specific process-related meanings within Case Central®.
For example, it's OK to swap Zip Code for Postal Code, but don't change Zip Code to City.
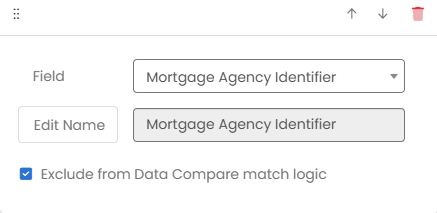
To require manual verification of a field, select the Exclude from Data Compare match logic checkbox. This prevents the system from defaulting the field to Match, no changes needed even when values are identical.
To add more data fields to the Section, click
under the field just added and repeat the process until all of the data fields for the Section have been added.Click Save.
Follow the same steps to add as many other Sections as needed. Each data field can be included in only once and in just one Section. It will not be available to add to a Section if it already included elsewhere.
Important
Make sure all relevant data fields for completing cases of any type have been added to a Section. Only data fields included in Data Compare Configuration will be available to admin users for selection when setting up a Data Compare step in an Investigation Checklist.
Once all of the Sections and data fields have been added, review the setup and make updates as needed. Click on a Section name on the left to open the list of included fields in the righthand panel.
Add additional data fields to the Section if any are missing.
Rename any Sections or data field display names if needed.
Change the order of the Sections or data fields by moving them up or down using drag-and-drop or the
 arrows.
If a Section should be removed, click the
 to the right of the Section label. If a field should be removed, click the
  icon for that field to delete it from the Section.
Click Save.
Note
If a Section contains no data fields, it will not be displayed for the Data Compare content type.
From the Checklist Administration page, click the
dropdown in the upper right-hand corner of the screen and select Reporting Configuration to open the Checklist Reporting Configuration panel.Click the
icon next to Reporting Columns to open the configuration section on the right.Enter a Name for the Reporting Column that is representative of the data field you are making available for reports. By default, the system will show New Field with a number appended.
Click the
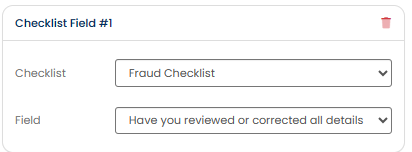
icon underneath the new field name to open the configuration box.Select the Checklist field you wish to make available for Reporting.
Choose a checklist from the Checklist dropdown.
Choose the field from the Field dropdown.
Note
Not all checklist fields are reportable, for example, complex fields like data compare, file uploads, and review files cannot be made into reporting columns.
Click Save.
If a Reporting Column is no longer needed or should no longer be available for reports, click the
icon to the right of the name of the Reporting Column.