The Case Audit Export document contains a summary of information about a case, its related investigation, and its resolution. The file is exported as an easy-to-read PDF document. with details including the dispute data received, pertinent account information, all investigation checklist findings and responses, and any communication activity related to the case.
Administrative users can export the document at any time after the case has been resolved. Alternatively, a System Preferences setting can be enabled to automatically generate a Case Audit Export for each case as soon as it has been set to Resolved.
Note
Case Audit Exports can only be generated for cases with a Status of Resolved.
Administration Guide
Who Can Use this Feature?
Management and use of this feature is available to all users with an Administrator license, by default. Users with a Standard license who have been granted Export Case Details site rights also have access to this feature.
Permission Scope can be set to My Case Detail Exports or All Case Detail Exports. If My Case Detail Exports is selected, the team member will be allowed to export summaries only for the cases they worked. If All Case Detail Exports is selected, they can export summaries for any resolved cases, regardless of whether or not they worked on them.
Where Is It Set Up?
To access the Case Audit Export page, click on the vertical sidebar menu. Then go to → .
Manual vs. Automatic Generation
Case Central supports both manual and automatic generation of Case Audit Export pdfs.
Manual Case Audit Export
Initiating a manual Case Audit Export can be done at any time after a case has been marked as Resolved.
Case Central® supports an export of up to 100 cases at a time. Keep in mind that it will take longer to generate the export when more cases are included.
Automatic Case Audit Export
Automatic generation of a Case Audit Exports is triggered as soon as a case is set to Resolved.
This functionality can be enabled as global System Preference by authorized users.
Managing Case Audit Exports Manually
Helpful Tips
Filtering Results
The page offers Advanced Filters to refine the results list and make it easier to find a previously generated document.
To narrow down the results by one or more keywords, enter a search term in the Text Filter box above the results list. Click Enter.
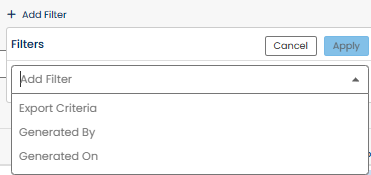
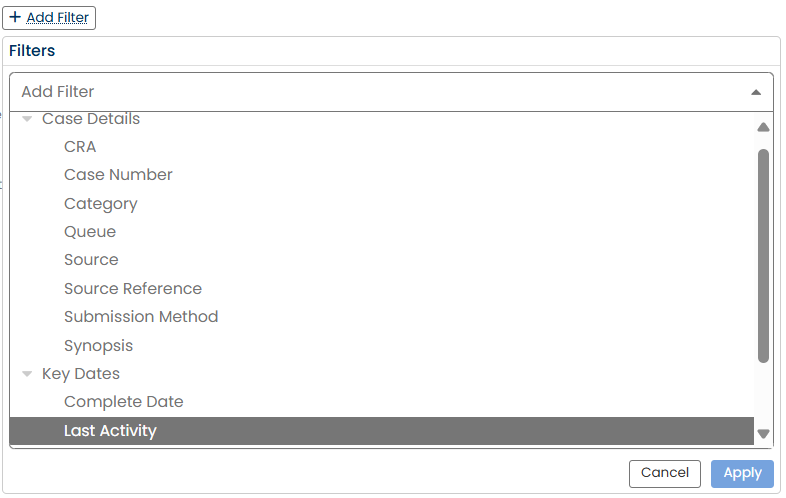
Additionally, certain fields can be used to filter the results to just those Case Audit Exports that are relevant. Click  to select the field and values to filter the results by. Click Apply and repeat for additional fields as needed.
Export Statuses
The Status column on the page will indicate whether an export is In Progress, Complete, or Errored.
The Download and Share actions are only available once an export has completed successfully. The Delete action is only available once an export has been completed, but this also includes exports that have an Errored status.
You can generate a manually using the feature under the panel.
Click the
 icon in the upper right side of the screen. The section will open.
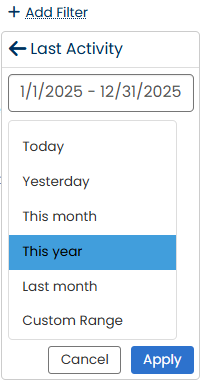
Set the export criteria either by using the Text Filter or the Advanced Filter.
Text Filter example:

Advanced Filter example:

Select if you want to Include Attachments from the case with the case export audit file. Move the slider icon to the right
 if you want to include case attachments. By default, attachments for the case will not be included.
Select if you want an email notification sent to you when the export is completed. Move the slider icon next to Notify Me to the right
if you want to be notified via email. By default, you will not get a notification email.
Click Generate.
Note
Currently, Account Number and SSN are masked in the Case Details section of the export but not masked in the Checklist section. This applies by default, as there is no toggle for masking in manual exports.
The settings you configure during manual export—such as Include Attachments and Notify Me apply only to that export and must be set each time.
Data Masking is not available in manual exports.
Click the
 icon under Actions on the page.
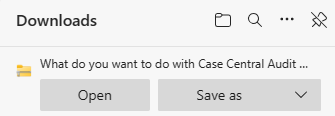
You will be prompted to open or save the Case Audit Export file.
Click the
 icon under Actions on the page. The panel will open.
Select the contact(s) with whom you would like to share the export. Users who are selected to have the export shared with them will receive an email containing the export.
Note
Only users of the system that are either Administrators or Standard Users with the appropriate export permissions can have the exports shared with them from within Case Central®.
To delete an export, click the  icon under Actions on the page. This will remove the export.
Helpful Tips
Automatic Export settings configured in the page apply only to automatically generated Case Audit Export documents.
Authorized users can still generate Case Audit Export documents manually from the section in the panel, with the ability to adjust export settings at the time of generation.
The Data Masking feature is exclusive to automatic exports and is not applied to manual exports created through the panel.
The Include Attachments option is available in both automatic and manual exports, but must be enabled independently in each context.
Case Audit Export System Preferences
When Automatic Export is enabled, Case Central® will generate a Case Audit Export document in PDF format automatically when a case is set to Resolved.
To set up automated export, navigate to the page by clicking Settings on the vertical sidebar menu. Then go to → .
Once Automatic Export has been enabled, additional settings controlling the inclusion of attachments and the redaction of Personally Identifiable Information (PII) in automatically-generated Case Audit Export documents will be made visible.

Automatic Export
To enable the automatic generation of a Case Audit Export, click the
 icon to move the toggle switch to the right position.
Once generated, the file can be found in the Attachments section of the page for that case.
Data Masking
This setting controls the masking of sensitive data in the Case Audit Export PDF. When enabled, only the last four characters of the Account Number, Date of Birth, and Social Security Number fields will be shown.
To enable the Data Masking setting, click the
icon to move the toggle switch to the right position.
Include Attachments
This setting controls the inclusion of a .zip folder containing the files attached to the case along with the Case Audit Export PDF.
To enable the Include Attachments setting, click the
icon to move the toggle switch to the right position.