QA Review Threshold Rules allow administrative users to define the parameters that make a case a candidate for QA Review. The configured business logic automatically flags cases that require QA Review and avoids the need for team members to send a case for QA Approval/Review manually.
Various criteria can be used to drive the routing of cases in terms of whether or not the QA Review process is required. These criteria can be based on Auto-Resolution Rules, specific Users of the system, or a wide range of data fields holding consumer, account, dispute, or case information.
Organizations may wish to do a quality check to make sure that auto-resolved cases are being processed correctly. However, this functionality is optional and does not need to be implemented.
Administration Guide
Who Can Use this Feature?
Management and use of this feature is available to all users with an Administrator license, by default. Users with a Standard license who have been granted QA Review Threshold Rules site rights also have access to this feature.
Where Is It Set Up?
To access the page, click on the vertical sidebar menu. Then go to → .
Key Terms
Minimum Threshold
The Minimum Threshold reflects the minimum number of cases that should be reviewed for quality assurance.
The threshold sets a limit on the volume of cases that can be auto-resolved, despite meeting the criteria as defined in the Auto-Resolution Rules.
The Minimum Threshold is set as a percentage of cases. If all cases should be reviewed, select 100%.
QA Review Types
Candidates for Auto-Resolution allows a user to set up a percentage of cases that should go to QA that would typically be processed automatically through auto-resolution.
Resolved By Specific User allows a user to set up which cases should go to QA review based on the user resolving a case.
All Other Cases allows a user to set up which cases should go to QA review based on other case criteria – such as dispute or account information.
Prerequisites
Important
Set up Auto-Resolution Rules before creating QA Threshold Rules for Candidates for Auto-Resolution.
Helpful Tips
Plan Ahead
Before setting up QA Review Threshold Rules in Case Central®, outline the rules for your organization.
Determine the appropriate percentages for the threshold settings. Identify the criteria that, when met, should route cases for QA Review, and map out the general flow of logic when multiple criteria apply.
Configuration Best Practices
Make each rule Label meaningful and easily understandable.
Be sure to use the Test Rules functionality to verify your rules are working as expected before they are released for use in a production environment.
Managing QA Review Threshold Rules
On the screen, select the tab.
To create a rule, click on the
 button or the
  link in the section.
Enter the Label for the rule.
Enter the Minimum Threshold percentage that should go to QA if the rule is met.
Select the Queue that the case should be routed to for review.
Select the Assignment Type for the queue.
Click Add. This will create the rule set section.
Set the filter for the rule set section. This can be set to either All of these are true or Any of these are true. Select All of these are true if you want all of the conditions built to be met (this is like an AND statement) or select Any of these are true if you just want any of the conditions to be met (this is like an OR statement).
Click on the
button underneath the filter.Select the data field you want to evaluate, the comparison operator, and then the Source of Record value(s).
Note
Specifically for rules relating to the selection of cases as Candidates for Auto-Resolution, the evaluation logic will be applied to the value(s) stored in the associated Source of Record. This will ensure that an organization's own account information will be used as the basis for complying with its own policies and designated limits.
Continue to add rules until you have fully built out your logic.
Note
If the logic you need to build is more complex and needs to be a combination of AND and OR statements, you can click on
 , which will allow you to build conditional logic within the original rule.
If you need to remove a condition from a rule, click the
 icon to the right of the condition and the entire line will be removed.
On the screen, select the tab.
To create a rule, click on the
button or the link in the section.Enter the team members who will need to have their work reviewed.
Enter the Label for the rule.
Enter the Minimum Threshold percentage that should go to QA if the rule is met.
Select the Queue that the case should be routed to for review.
Select the Assignment Type for the Queue.
Note
The Queue is defined by the case being worked.
If you want to add additional conditions to the rule, check the Add Additional Rules checkbox. Note that this field is only available when adding a rule set.
Click Add. This will create the rule set section.
If you checked Additional Rules, then set the filter for the rule set section. This can be set to either All of these are true or Any of these are true. Select All of these are true if you want all of the conditions built to be met (this is like an AND statement) or select Any of these are true if you just want any of the conditions to be met (this is like an OR statement).
Click on the
button underneath the filter.Select the field you want to evaluate, the comparison operator, and then the dispute value(s).
Note
The evaluation logic will be applied to value(s) received in the originating direct dispute or from e-OSCAR®.
Continue to add rules until you have fully built out your logic.
Note
If the logic you need to build is more complex and needs to be a combination of AND and OR statements, you can click on
, which will allow you to build conditional logic within the original rule.If you need to remove a condition from a rule, click the
icon to the right of the condition and the entire line will be removed.
On the screen, select the tab.
To create a rule, click on the
button or the link in the section.Enter the Label for the rule.
Enter the Minimum Threshold percentage that should go to QA if the rule is met.
Select the Assignment Type for the Queue.
Note
The Queue is defined by the case being worked.
Click Add. This will create the rule set section.
Set the filter for the rule set section. This can be set to either All of these are true or Any of these are true. Select All of these are true if you want all of the conditions built to be met (this is like an AND statement) or select Any of these are true if you just want any of the conditions to be met (this is like an OR statement).
Click on the
button underneath the filter.Select the field you want to evaluate, the comparison operator, and then the dispute value(s).
Note
The evaluation logic will be applied to value(s) received in the originating direct dispute or from e-OSCAR®.
Continue to add rules until you have fully built out your logic.
Note
If the logic you need to build is more complex and needs to be a combination of AND and OR statements, you can click on
, which will allow you to build conditional logic within the original rule.If you need to remove a condition from a rule, click the
icon to the right of the condition and the entire line will be removed.
Click the
 icon on the right-hand side of the rule set.
Make updates to the parameters you need to change.
Click Edit.
Rules will not be active in the system until they have been published. Once you have created all of the rules, click the
 button in the upper right corner of the screen.
Export
Click the
 icon to open the menu and select Export.
You will receive a message prompting you to either open or save the file.
Save the file if you plan on importing it into another Case Central® environment later.
Import
Click the
icon to open the menu and select Import.A panel will open prompting you to select the JSON file that you wish to import into the system.
Publish the rules after they have been imported in order for them to be live in the system.
To test QA Review Threshold Rules, the rules must be published first.
Once the rules have been published, click on
 .
.This will open a window where you can enter a case number and then click Run.
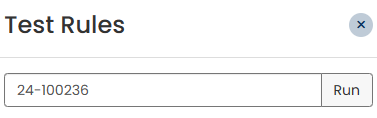
You will get a message that states if the case meets the criteria or not. It is good to test cases that you know both should and should not meet the rule conditions.
Click the
 icon on the right-hand side of the rule in order to delete the rule set.