Case Central® supports Categorization to organize cases that follow the same general process rules into groups or types for greater efficiency. Administrative users can create categories and related forms to gather the necessary information and route the cases according to the policies and procedures of their own organization.
Case Categories can be created to support an organization's existing business processes, or can be developed in conjunction with the implementation of Case Central®. Their use and number are dependent on requirements, and there is not one correct organization structure that works best for all. Examples of Categories that some customers find useful include Internal Requests, e-OSCAR® ACDV, e-OSCAR® Block Notifications, and Direct Disputes.
Intake Forms are used to open or create a new case using manual input when the supporting details have been received outside of e-OSCAR®, an internal Source of Record, or other integrated system. They contain a set of data collection fields, which may include information about the consumer, the account, and the dispute or complaint, as well as previously created User Defined Fields. To maximize efficiency, each Intake Form can be designed to contain only the fields needed to process cases belonging to that specific Case Category.
Administration Guide
Who Can Use this Feature?
Management and use of this feature is available to all users with an Administrator license, by default. Users with a Standard license who have been granted Categorization site rights also have access to this feature.
Where Is It Set Up?
To access the page, click on the vertical sidebar menu. Then go to → .
Categorization Helpful Tips
Filtering Results
The page offers Text Filters to refine the results list and make it easier to find an existing Category. This is particularly helpful when more than one page of results is returned.
To narrow down the results by one or more keywords, enter a search term in the Text Filter box above the results list. Click Enter.
Plan Ahead
Before setting up Case Categories, think through the types of cases your organization processes and which have unique steps and/or teams that work them. While Categories may be added at any time, organizing how the data will be captured and sortable will facilitate reporting in the future.
For each Category, put together a complete list of the information needed to investigate and process the case. Map out the flow for the Intake Form and determine the best Content type for each piece of information you need to collect.
Intake Form Configuration Best Practices
Keep the number of fields in grouping or "step" to no more than 20. An excessive number of data fields can be overwhelming for the end-user and could cause the step to load slowly on the screen.
Certain fields will allow the end-user to submit an Intake Form when blank, even when they are Required. These fields, which are limited to First Name, Last Name, Account Number, and Social Security Number, contain an additional setting labeled Enable 'Unable To Locate'. When the setting has been enabled, the Required attribute is overridden.
When Seven Year Payment History is included on an Intake Form, it is best to use it as a standalone Content item in its own step.
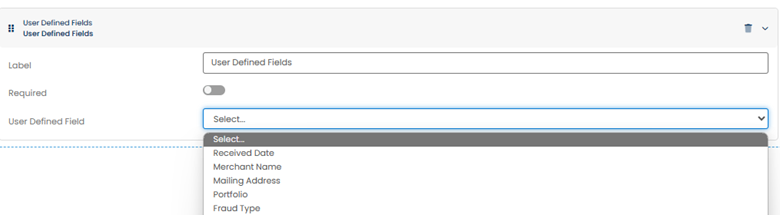
If your organization has created any User Defined Fields, they can be included on an Intake Form. To add a UDF, drag and drop the User Defined Fields item from the Content panel into the main area. A dropdown list of UDFs will allow you to select the one you want to add to the form.

Managing Categories
Click the
 button in the upper right-hand side of the page and select to open the panel.
Set the Status of the category. By default, the status is Active. To make the category inactive, click the
 icon to move the toggle switch to the left
  position.
Enter the Label (name) of the category, as well as a description if desired.
Configure the styling elements for the Category.
Choose an icon from the dropdown to represent the Category.
Select a color for the Category using the Color Picker field by typing in the desired Color Code or by clicking on the colored square to open the color preview panel. Using the cursor, click on the rainbow ribbon to preview the approximate color and then click again within the box to select the desired shade.
Set whether an Investigation Checklist should be Required in order to resolve a case in this Category. By default, it will not be Required.
To make the Investigation Checklist Required, click the
icon to move the toggle switch to the right position.Set whether all To Do's should be completed in order to resolve a case in this Category. By default, To Do's are not required to be completed to resolve a case.
To require that all To Do's be completed before resolving a case, click the
icon to move the toggle switch to the right position.Click Next to open the configuration screen for the Intake Form that will be used for this Case Category. The screen will load with the Category Name at the top left and three panels across the page.
The Step List on the left shows each question or step on the Case Form that the user will fill out when opening a new case in this Category. Initially, the first step will have a placeholder title of New.
The middle panel has fields for the Title and Description of each step. It also contains a configuration box titled Main Area which is where the selected Contents are configured.
The righthand panel contains the list of Content types that are available for use in the configuration of each step.
Type the name of the first step in the Add title field at the top of the middle panel.
For example, if you wanted to collect consumer personal information first, you may want to label the step as Consumer Information.
Next, drag and drop the fields you want to collect in the first step from the right-hand side of the screen into the Main Area box. Once inside, each Content item will pop open with the fields that are relevant for setting up that Content type.
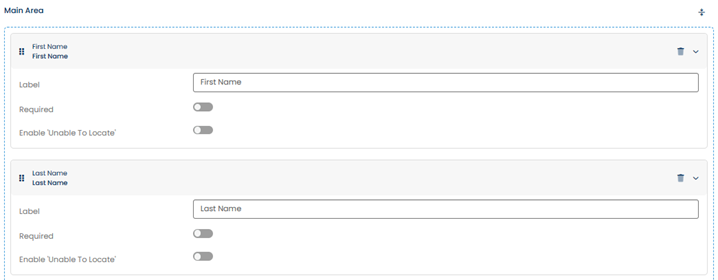
Also, once a Content item has been placed into the Main Area, that field will have an
 label appear to the right of its name.
Configure each Content item in the configuration box.
Update the Label for the fields, if desired. Keep in mind that the response values will be mapped back to the related fields in Case Central® and other systems, so be sure that any changes to the name will still align to the underlying meaning of the data and how it will be used.
By default, all of the fields are optional, but you can set them to Required by clicking the
icon to move the toggle switch to the right position.Note
The Instructions field type has no required setting as it is just informational.
Review the setup for the step and make updates as needed.
Change the order of the Content fields by moving them up or down in the Main Area as needed.
If an added field should be removed, click the
 icon to delete the field from the step.
When the first step is complete, click the
 icon on the Step List to add another step. Repeat the process for as many steps as needed for the Intake Form.
Once all the steps have been added and are fully configured, review the form and make any necessary final changes. If the order of the steps isn't correct, they can be reordered by moving them up or down in the Step List.
Click
 to publish the Intake Form for the Category.
To navigate back to the page, click the
 icon in the upper left corner of the screen next to the Category Name.
Edit Category Properties
Click the
 icon in the Actions column on the to open the panel.
Update the configuration settings for the Category as needed.
Click Save.
Edit a Category Intake Form
On the page, click the
 icon in the Actions column to open the configuration screen.
Make any changes needed. The interface is the same as when creating an Intake Form.
Click
to make your changes Active.
Export a Category
Click the Export Category
 icon. Depending on your computer settings, you may see a pop up message prompting you to either open or save the file.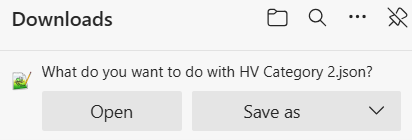
Save the file if you plan on importing the Category later.
Import a Category
Click the
button and select Import Category to open a panel prompting you to select the JSON file containing the Category you wish to import.Once the file has been imported, verify the settings are as you expect them to be.
Note
The Category will be Active automatically upon import.
To disable the use of a Category, click the
icon in the Actions column to move the toggle switch to the left position.To enable the use of a Category, click the
icon in the Actions column to move the toggle switch to the right position.
Note
You can also enable or disable a Category by updating the Status field on the panel.