Administrative users can create logical groupings of user resources called Queues to streamline case assignment. Queues are often used to distinguish which team members can access or work certain cases and to facilitate Auto-Assignment of new cases.
Typically, Queues are configured to set the parameters controlling which data are viewable by a team member, as well as which roles that person can fill on a case. Queues can also be leveraged to control access to various Case Central® functions, including aspects of reporting.
Administration Guide
Who Can Use this Feature?
Management and use of this feature is available to all users with an Administrator license, by default. Users with a Standard license who have been granted Queues site rights also have access to this feature.
When enabling Queues site rights to team members with a Standard license, administrative users can designate whether such access should be limited to only those Queues where they are a Queue Manager, or whether access to all Queues is appropriate.
Where Is It Set Up?
To access the page, click on the vertical sidebar menu. Then go to → .
Queue Roles
When a user is added to a Queue, they are granted the Assign Work permission by default. In addition, there are four roles that can be enabled, allowing the user to perform additional functions related to a case. One or more of these may be selected at a time. All queues are required to have at least one Queue Manager and one QA Reviewer.
Tip
We recommend that all queues have at least two QA Reviewers and two Escalation Contacts defined to ensure seamless progress through the review process.
Queue Manager
A Queue Manager can make changes to the Queue itself. They can manage Queue Membership by adding or removing users from the list and adjusting a member's roles.
Assign Work
When checked, a user is eligible to be selected as the Case Lead on any case routed through the Queue, whether dispatched manually or via Auto-Assignment.
When adding a new member to a Queue, the Assign Work box will be checked by default.
QA Reviewer
A QA Reviewer may be assigned a QA Review activity to evaluate whether a case investigation has been completed appropriately and noted correctly before the case is set to Resolved.
Escalation Contact
Allows the user to be selected as the person a case can be escalated to when additional review or handling is required.
At least two escalation contacts must be identified to ensure a user cannot escalate a case to themselves (except in single-person queues where no escalation contact is set).
Note
To use this role, the user must have a Case Inventory Scope of Member of the Support Team, Member of the Case Queue, or All Cases. The Assigned as Case Lead scope is not supported for Escalation Contacts and will prevent the escalation option from functioning correctly.
Helpful Tips
Page Layout
Upon opening the page, a list of existing Queues and their members are shown. By default, a visual grid layout, called Card View is shown. A second way to view Queues information is also available - a more traditional columnar layout, called Table View.
To toggle between the two views, use the icons on the left side of the screen above the results. Click the  icon on the right for Table View, or select the
  icon on the left to go back to Card View.
Filtering Results
The page offers Advanced Filters to refine the results list and make it easier to find an existing Queue. This is particularly helpful in a larger organization or when more than one page of results is returned.
To narrow down the results by one or more keywords, enter a search term in the Text Filter box above the results list. Click Enter.
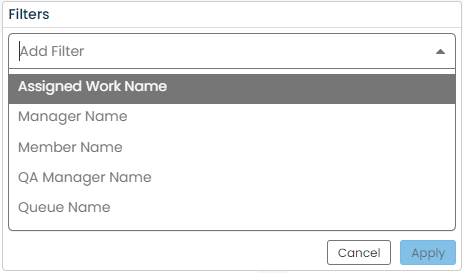
Additionally, certain fields can be used to filter the results to just those Queues that are relevant. Click  to select the field and values to filter the results by. Click Apply and repeat for additional fields as needed.
Queue Membership Requirements
All Queues are required to have at least one Queue Manager and one QA Manager. If a team member is removed from a Queue and no other Queue member satisfies the requirements, a warning prompt will appear indicating that an eligible member must be added.
Managing Queues
Click the
 icon at the upper right corner of the page.
Provide a unique name for the Queue. Each Queue must have a name that is not already in use.
Designate which users should belong to the queue. The administrative user creating the Queue will be added by default.
Click the dropdown menu for Team Member Lookup.
Select the name of the user you'd like to add.
Click Add to .
Select the applicable Queue Roles for the added user.
Repeat the process until all users have been added.
Click Save.
Click the
 icon to edit an existing Queue by locating the appropriate card or row in the results table.
Modify Queue names, add or remove Users, and adjust Queue Roles as needed.
Note
If a team member is removed from a Queue and no other Queue member has the proper permissions in place to be the QA Reviewer, a warning prompt will appear indicating that an eligible member must be added. The system enforces this requirement and will display a clear Missing QA Reviewer message if no QA Reviewer is assigned.
Click Save.